blinds

Simple blind motorisation with Automate Basics

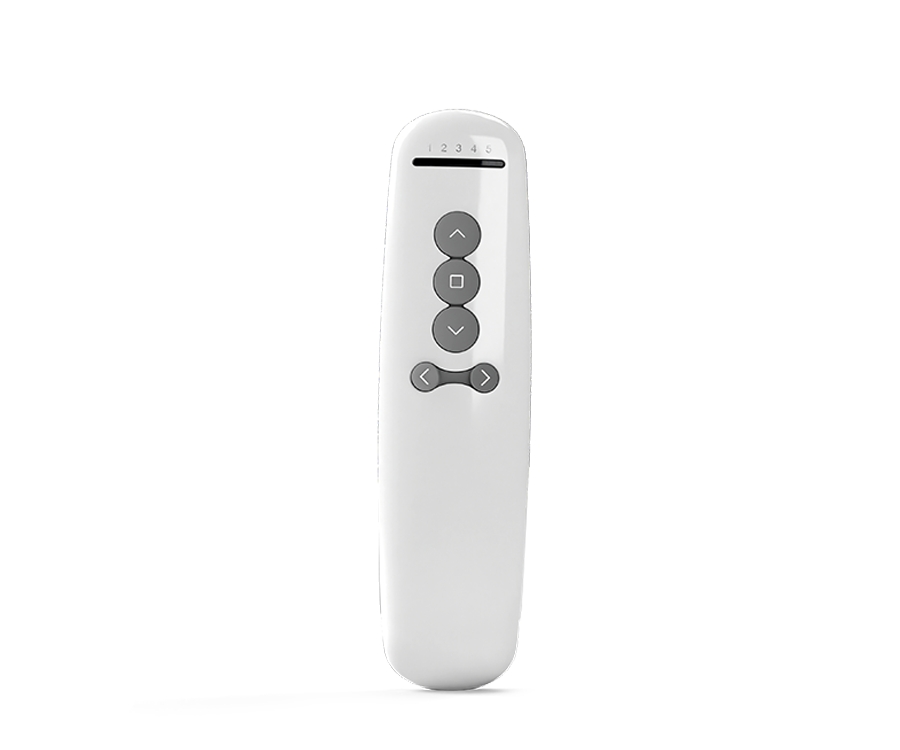
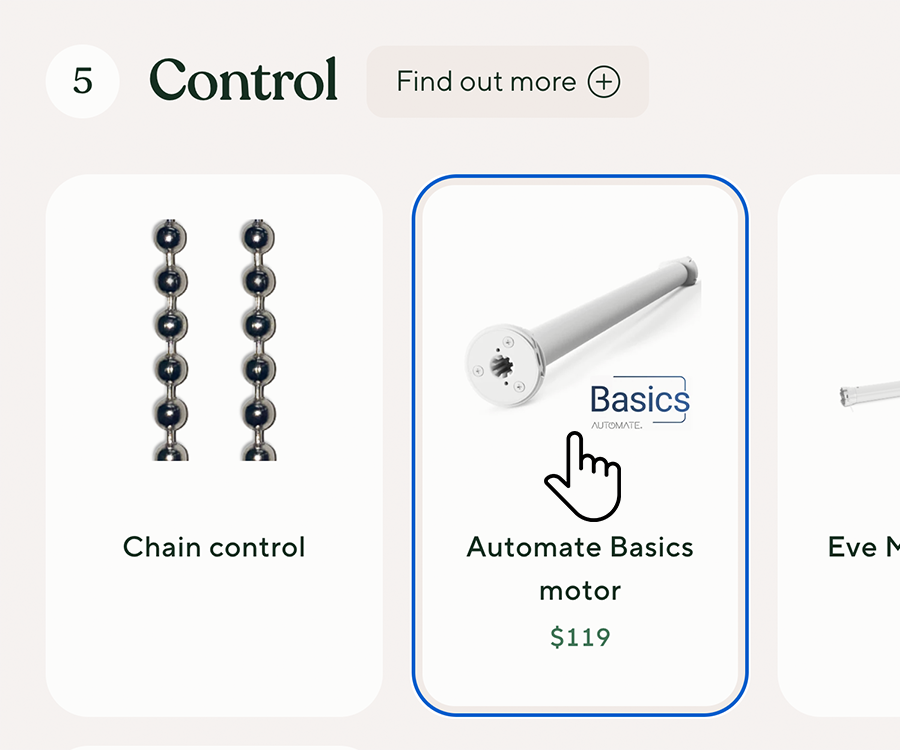
The Automate Basics motor adds push-button control to our roller blinds for $119 per blind, with a $39 remote that runs up to 5 blinds. It is a genuine Rollease Acmeda motor, kept deliberately simple, at a price that makes motorising a whole room realistic. Charge it a couple of times a year and everything else happens from the remote.

What is the Automate Basics motor?

Basics is the simplest motor made by Automate, the motorisation arm of Rollease Acmeda, a global specialist in window furnishing hardware. Many budget blind motors are generic, unbranded units with no recognised name behind them. Basics is a genuine brand-name motor, engineered by the same company behind the hardware in millions of blinds worldwide. It is a basic motor by design, not a compromise on quality.

Here is what you get:

- Up, down, and stop at the press of a button

- A programmable favourite position, so the blind returns to your preferred height with one button

- Adjustable operating speed

- A battery check function, so you know when a recharge is due

Everything runs from the remote, so there is no app to download and nothing to connect to your wifi. If you want your blinds in a smart home ecosystem, our Motionblinds motors do exactly that. Basics suits anyone who wants the blinds to move without getting out of bed or off the couch.

Why we like it
Genuinely affordable motorisation

At $119 for the motor and $39 for the remote, this is about as accessible as quality motorisation gets. One Basics 5 Channel remote controls up to 5 individual blinds or 5 groups, so a whole room of motorised blinds needs just one remote.

Months between charges

The motor runs on a rechargeable battery sealed inside the roller tube. Expect 6 to 9 months between charges, depending on how often the blind runs and how large it is.

Easy magnetic recharging

Every motor comes with a magnetic charging cable. The connector clicks into place on contact, so there is no squinting at a tiny port while you balance on a ladder. The cable plugs into any standard USB wall adaptor or power bank (adaptor not included).

Fits smaller blinds too

The Basics motor suits roller blinds from just 575mm wide, so smaller windows that miss out on some motorisation systems are covered.

Pre-installed and ready to go

The motor arrives fitted inside the roller tube of your new blind. Installation is the same as any of our DIY roller blinds: fix the brackets, click the blind in, and pair the remote.

Backed by a 3-year warranty

The Basics motor is covered by a 3-year manufacturer warranty from Rollease Acmeda. Generic motors sold online often carry a year of cover at best, and sometimes none at all.

Basics or Motionblinds: which one suits you?

Both are quality motors. The right choice comes down to how you want to control your blinds.

Choose Automate Basics if you prefer a click to a tap. It gives you straightforward remote control at the sharpest possible price, with up, down, stop, and a favourite position covered.

Choose Motionblinds if you want app control, scheduling, and smart home integration with Apple HomeKit, Google Home, or Amazon Alexa. Read more in our Motionblinds guide.

How to order

1. Measure your window using our measuring guide

2. Choose your fabric from our motorised roller blinds

3. Select the Automate Basics motor as your control type, then add the Basics 5 Channel remote

4. We fit the motor inside the roller tube while we make your blind in our factory, so it arrives ready to install

Not sure on fabric? Order samples with free express post and see the colours in your own home first.

Programming your Basics remote

Your motor arrives fitted inside the blind, so programming is a one-off job that takes a few minutes. These steps come from the official Automate Basics programming guide. Two buttons to know: the P1 button on the motor head, and the Prg button inside the battery cover on the back of the remote.
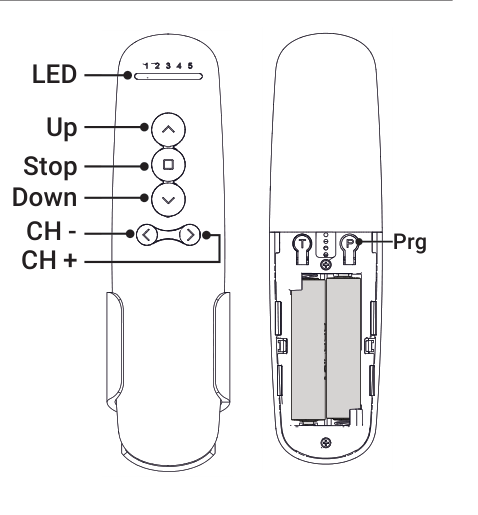
Automate Basics 5 channel remote button layout, with the Prg button inside the battery cover

Pair the remote to a blind

1. Use the CH arrows on the remote to select the channel you want the blind on

2. Press the P1 button on the motor head for 2 seconds, until the motor jogs once

3. Within 4 seconds, press and hold the stop button on the remote for 3 seconds. The motor jogs twice to confirm
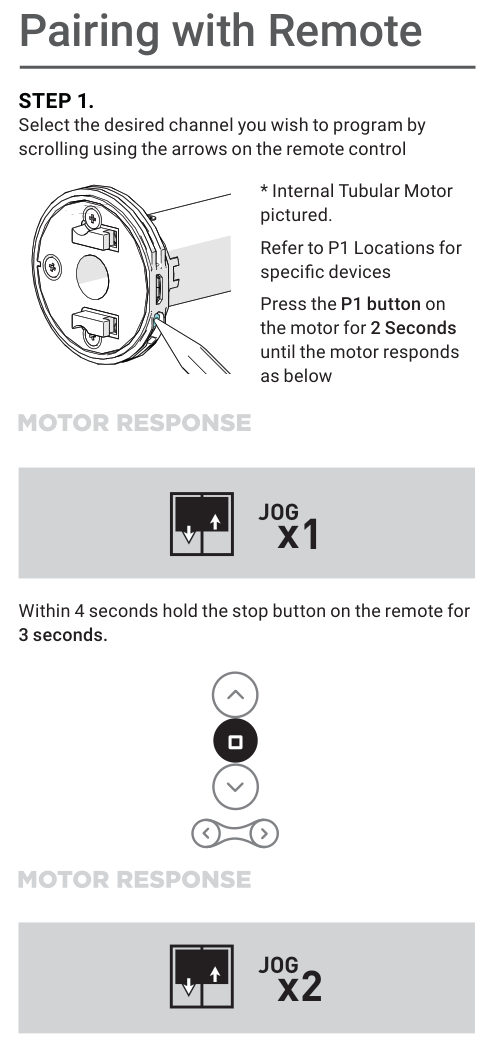
Pairing the Basics remote to the motor using the P1 button

If the blind runs the wrong way, hold the up and down buttons together for 2 seconds to reverse the direction. Do this before setting your limits.
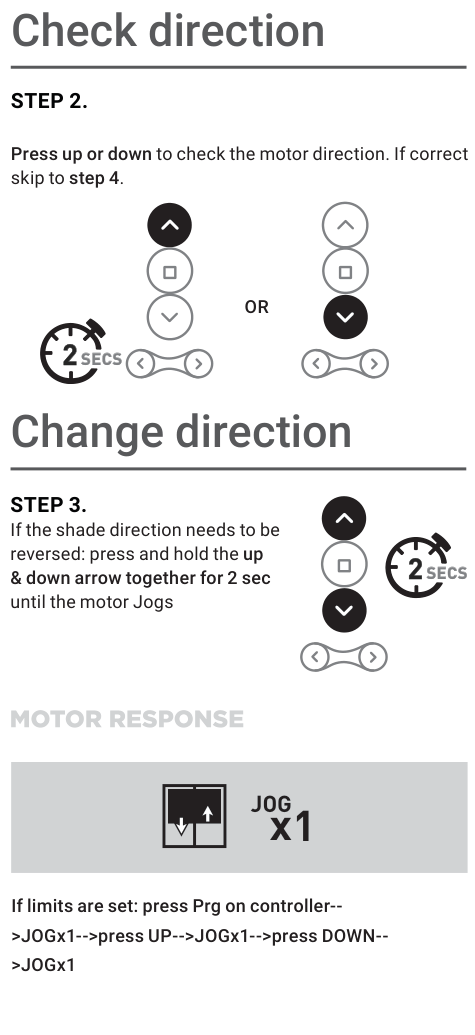
Checking and reversing the motor direction on the Basics remote

Set the travel limits

1. Drive the blind to your preferred top position, then hold up and stop together for 2 seconds. The motor jogs twice to save it

2. Drive the blind to your preferred bottom position, then hold down and stop together for 2 seconds. The motor jogs twice to save it
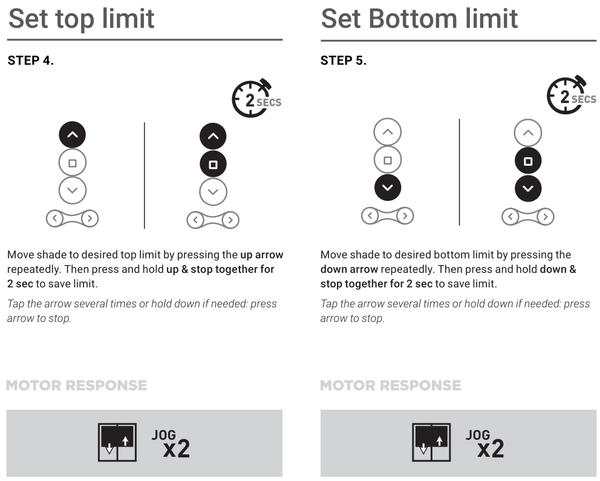
Setting the top and bottom travel limits with the Basics remote

Save a favourite position

Move the blind to the height you use most, then hold CH+ and stop together for 2 seconds. The motor jogs twice to confirm. From then on, holding stop for 2 seconds sends the blind straight to that position. The same button combination also deletes the favourite (a single jog), so if you only see one jog, simply set it again.
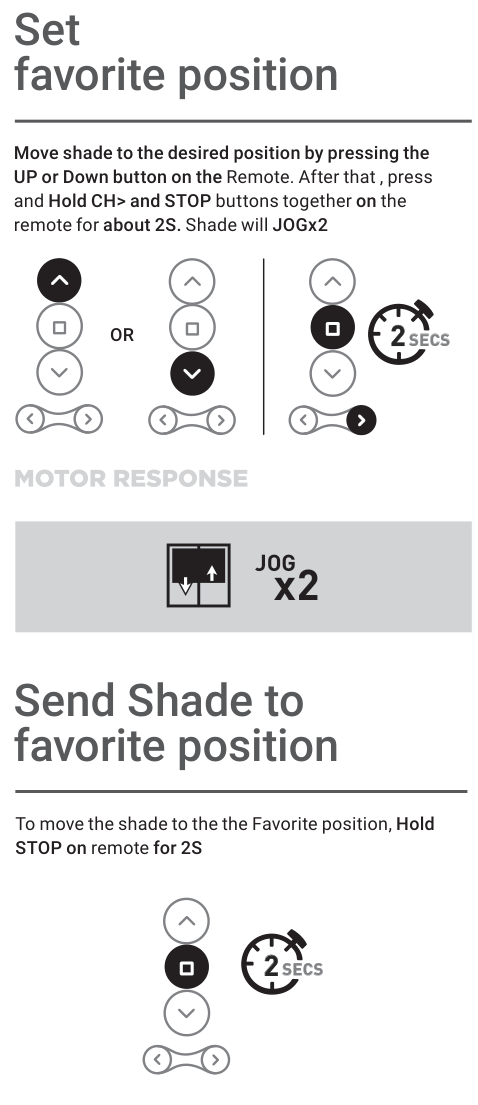
Saving and recalling a favourite position on the Basics remote

Adjust the speed

Press Prg, then stop, then up to step the speed up. Press Prg, then stop, then down to step it down. The motor jogs after each press, and if it does not jog on the last one, it is already at its fastest or slowest setting.
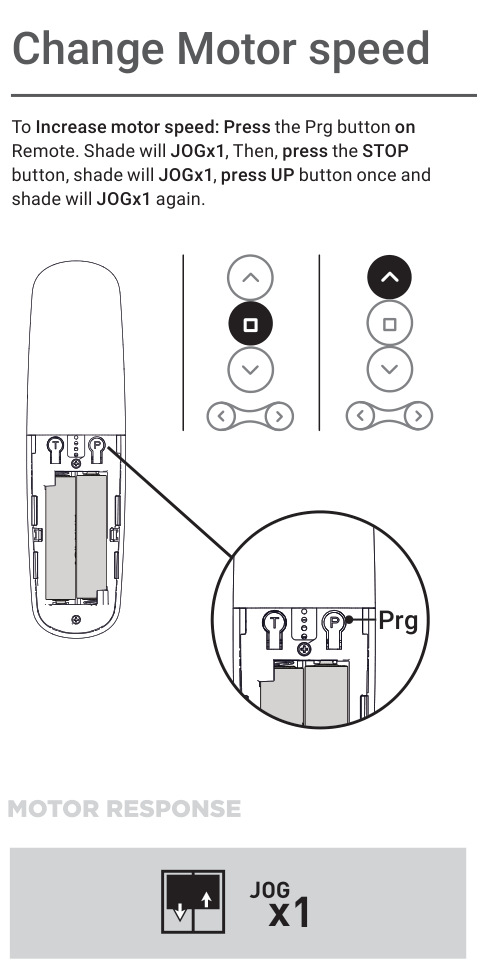
Changing motor speed using the Prg button on the Basics remote

Check the battery

Run the blind to its top limit, then hold up for 5 seconds. The blind travels down to show the charge remaining, so stopping about 80% of the way down means about 80% charge. When the battery runs low, the light on the motor head flickers as the motor starts. That is your cue to clip on the magnetic charging cable.
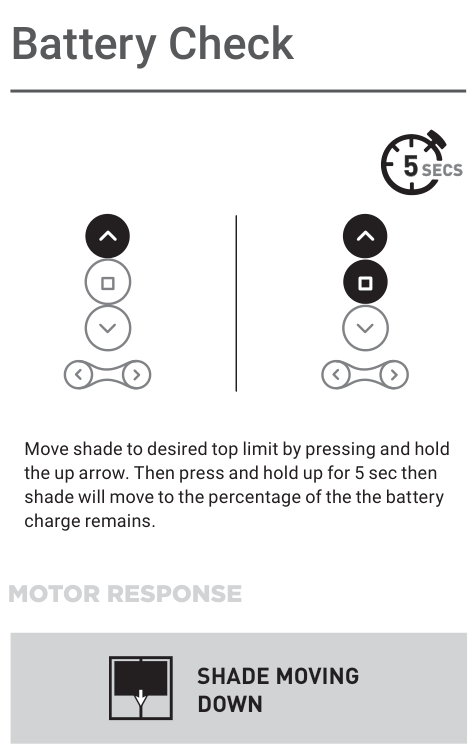
Checking battery charge with the Basics remote

Run several blinds from one channel

Keep the remote on the same channel and repeat the pairing steps on each motor. Every blind paired to that channel then moves together, which is handy for a bank of windows along one wall.

DIY Curtains: Can You Install Sheers Yourself?

Absolutely — and it's easier than most people think. If you can handle a cordless drill, you can install sheer curtains yourself. Modern DIY curtain systems come with everything you need: the track, brackets, screws, hand wands, and clear installation guides.
The key is getting your measurements right before you order. Measure your window width and drop in three places (left, centre, right) and use the smallest measurement. This accounts for any unevenness in your ceiling or window frame and ensures a clean, professional fit.
For S-fold sheers — the most popular heading style for that contemporary, wave-like drape — a designer aluminium track is included, and installation is straightforward whether you're face-fixing to the wall above the window or top-fixing directly to the ceiling for a dramatic floor-to-ceiling look.

Learn more about Measuring & Installation