Curtains
How to install face fix curtains
Face fix curtain installation instructions
Installation requirements can vary from home to home or even window to window. So, be sure to follow the below instructions carefully (or refer to the printed instructions supplied with your curtains). After reviewing your instructions, please don’t hesitate to get in touch for on-the-spot support.
Your curtains will arrive ready to install. However, it is a good idea to check you have all the fitting parts required before commencing assembly. You can identify the items provided below or on the printed instructions document provided with your order. The number of fitting parts will vary dependent on your curtain order size and the track widths. In the event you find you are short of any fitting parts, please get in touch and we’ll send the missing parts immediately.

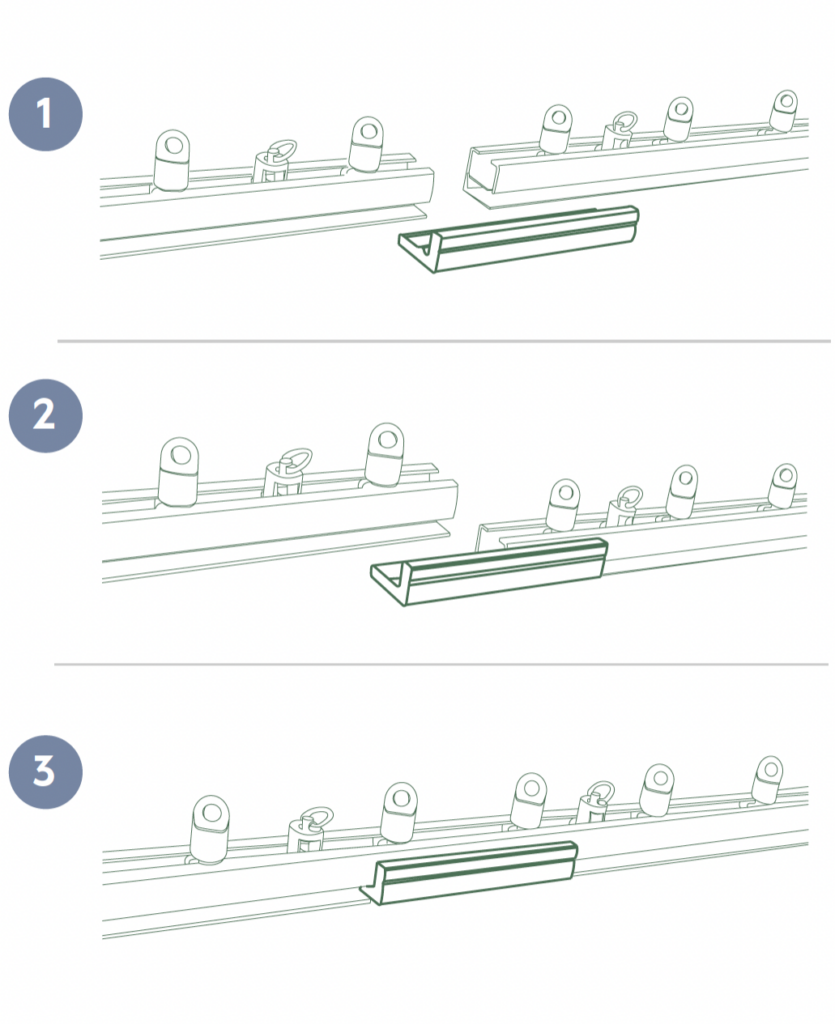
Joining your track
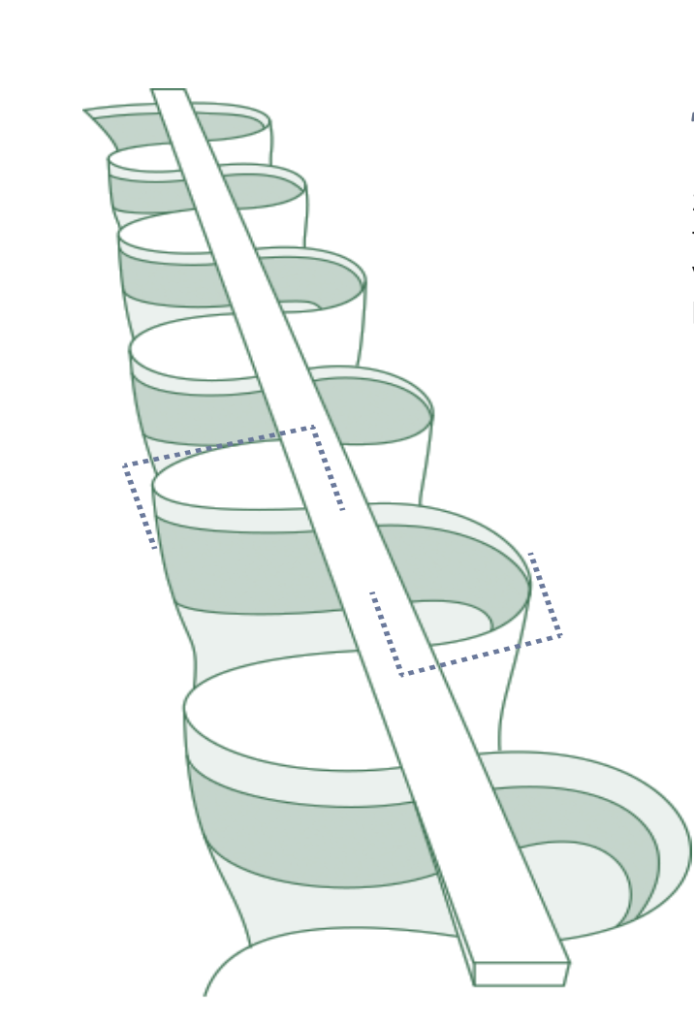
Tracks ordered at widths over 2300mm will be supplied in evenly split sections due to shipping limitations. These track sections need to be joined together with the small ‘joiner’ component as follows:
a. First, slide the joiner piece half way through one length of track
b. Slide the second length of track over the exposed half of the joiner
c. Some force may be required to connect the two track segments
Face fix installation
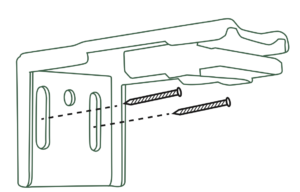
Step 1. Position two brackets approximately 150mm from either end of the track on the left and right sides. Fasten these brackets with the provided screws* or screws appropriate for your wall surface, ensuring the brackets are all set level.
If you are fixing your curtain tracks into plasterboard, please ensure the brackets are being secured to wall studs. If this can’t be achieved, you will need to obtain wall plugs and screws suitable for installation into plasterboard.
Position any remaining brackets evenly between the two end brackets, ideally at approximately 700-750mm intervals from one another. When arranged, fasten all brackets in place. You should have been supplied with the correct number of face fit brackets to achieve this outcome. If that’s not the case, please contact us for support.
Pro tip: the very top of the brackets should line up with the topmost point of the drop measurement provided in your order. Loosely fasten the screws in the centre of the bracket holes as this will allow you to adjust the bracket position up and down to achieve the perfect drop.
Please note, we have already made a 15mm deduction to your total curtain drop to allow for the curtain to be underslung on your track. This does not affect the fixing point of your bracket.
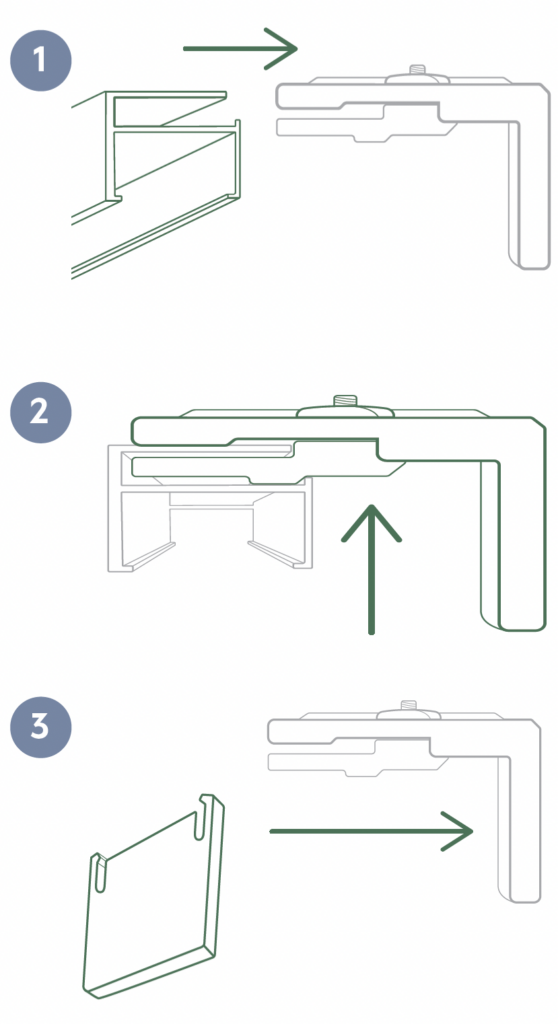
Step 2
a. Clip the track into the brackets by securing the back of the track between the metal and the plastic clip
b. Gently fasten into place with the underside screw.
c. Clip the bracket caps over the brackets
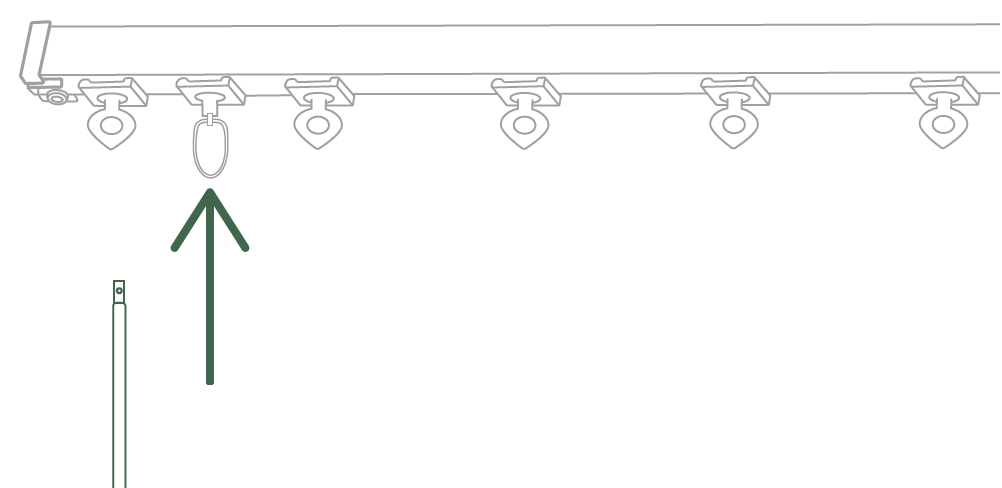
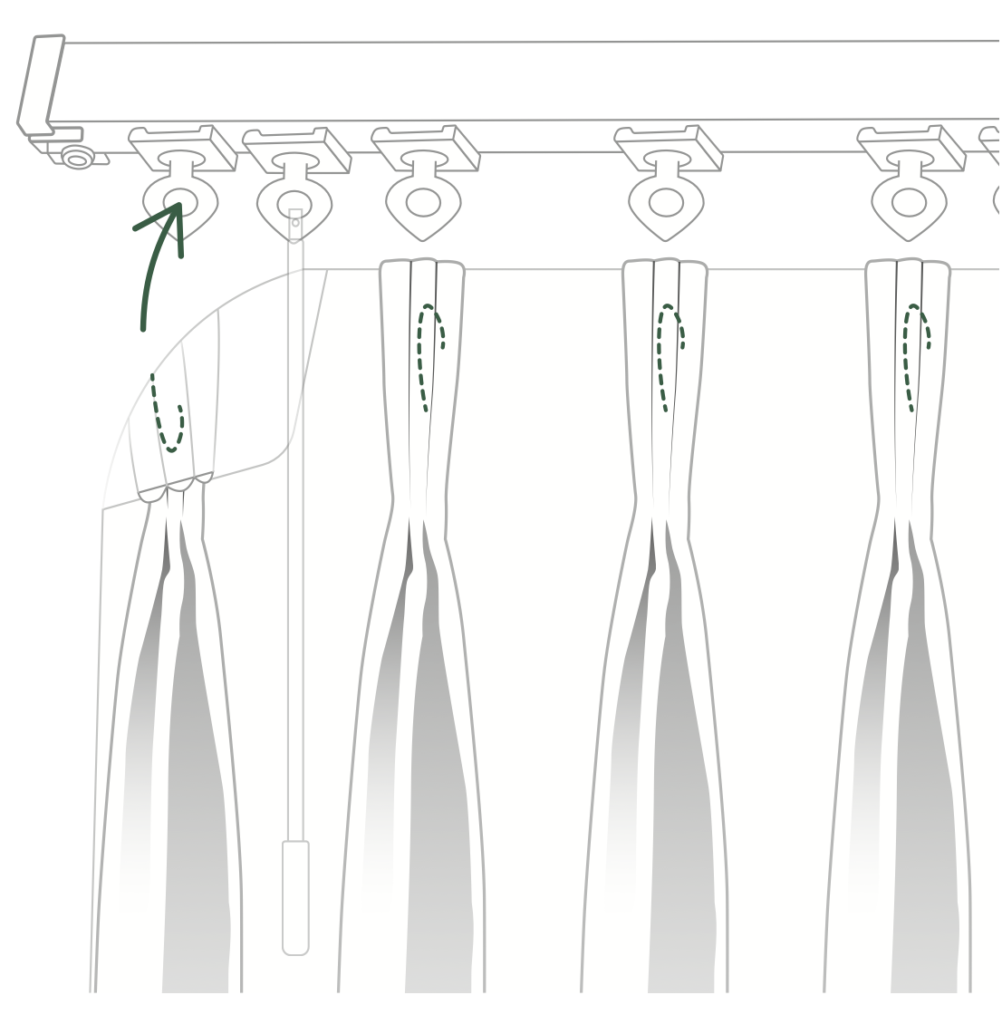
Connecting the hand wand
Connect the hand wand to the dedicated runner on the opening side of your track. For S-fold curtains, the dedicated runner will look a little different from the rest of the runners. For a pinch pleat curtains, reserve the second runner for your wand. Initially, the clip on the wand can be a little stiff. If so, use pliers to gently pry it open so it can be more easily attached to the runner. In the event of any damage occurring, please contact us.
Hanging your curtains
S-fold curtains
To hang your S-fold curtains, use the hooks already attached on the back of the curtain to loop through the string of curtain runners found inside your track. To achieve the wave effect, make sure the waves are of even depth in front and behind the track. If some waves look ‘shallow’ then gently push that fold back so it creates a deeper wave at the rear.
Pro tip: start the hanging process from the curtain stacking side, with the edge of the curtain pointing towards the window.
Pinch pleat curtains
To hang your pinch pleat curtain, simply use the hooks already attached on the back of the curtain to loop through the loose curtain runners. If you require more runners, simply unscrew the end cap of the track and load in as many as you require from the amount provided. If you feel you need more runners, get in touch and we’ll get them to you.
Pro tip: initially, runners may be a little stiff and resistant to movement with the wand. While this will ease with use, if you would like to speed things up (in all senses!), we recommend removing the curtain and applying a very small amount of spray lubricant to the inner track area. Leave it for at least a 2 hours and then carefully re-attach the curtain hooks to the runners (ensuring you have none of the lubricant on your hands before doing so!).
Dressing your new curtains
Being the amazing DIY installer you are, you’ve now successfully installed your curtains – well done! But wait a minute, are they looking a little disheveled from their epic journey? If so, don’t despair as it’s actually pretty simple to sort out. Watch our Dressing your new curtains video and you’ll have them looking ‘tip top’ in no time!