Curtains
Curtains
How to install curtains
Installation requirements can vary from home-to-home or even window-to-window. So, be sure to follow the below instructions carefully (or refer to the printed instructions supplied with your curtains). After reviewing your instructions, don’t hesitate to get in touch if you have any questions.
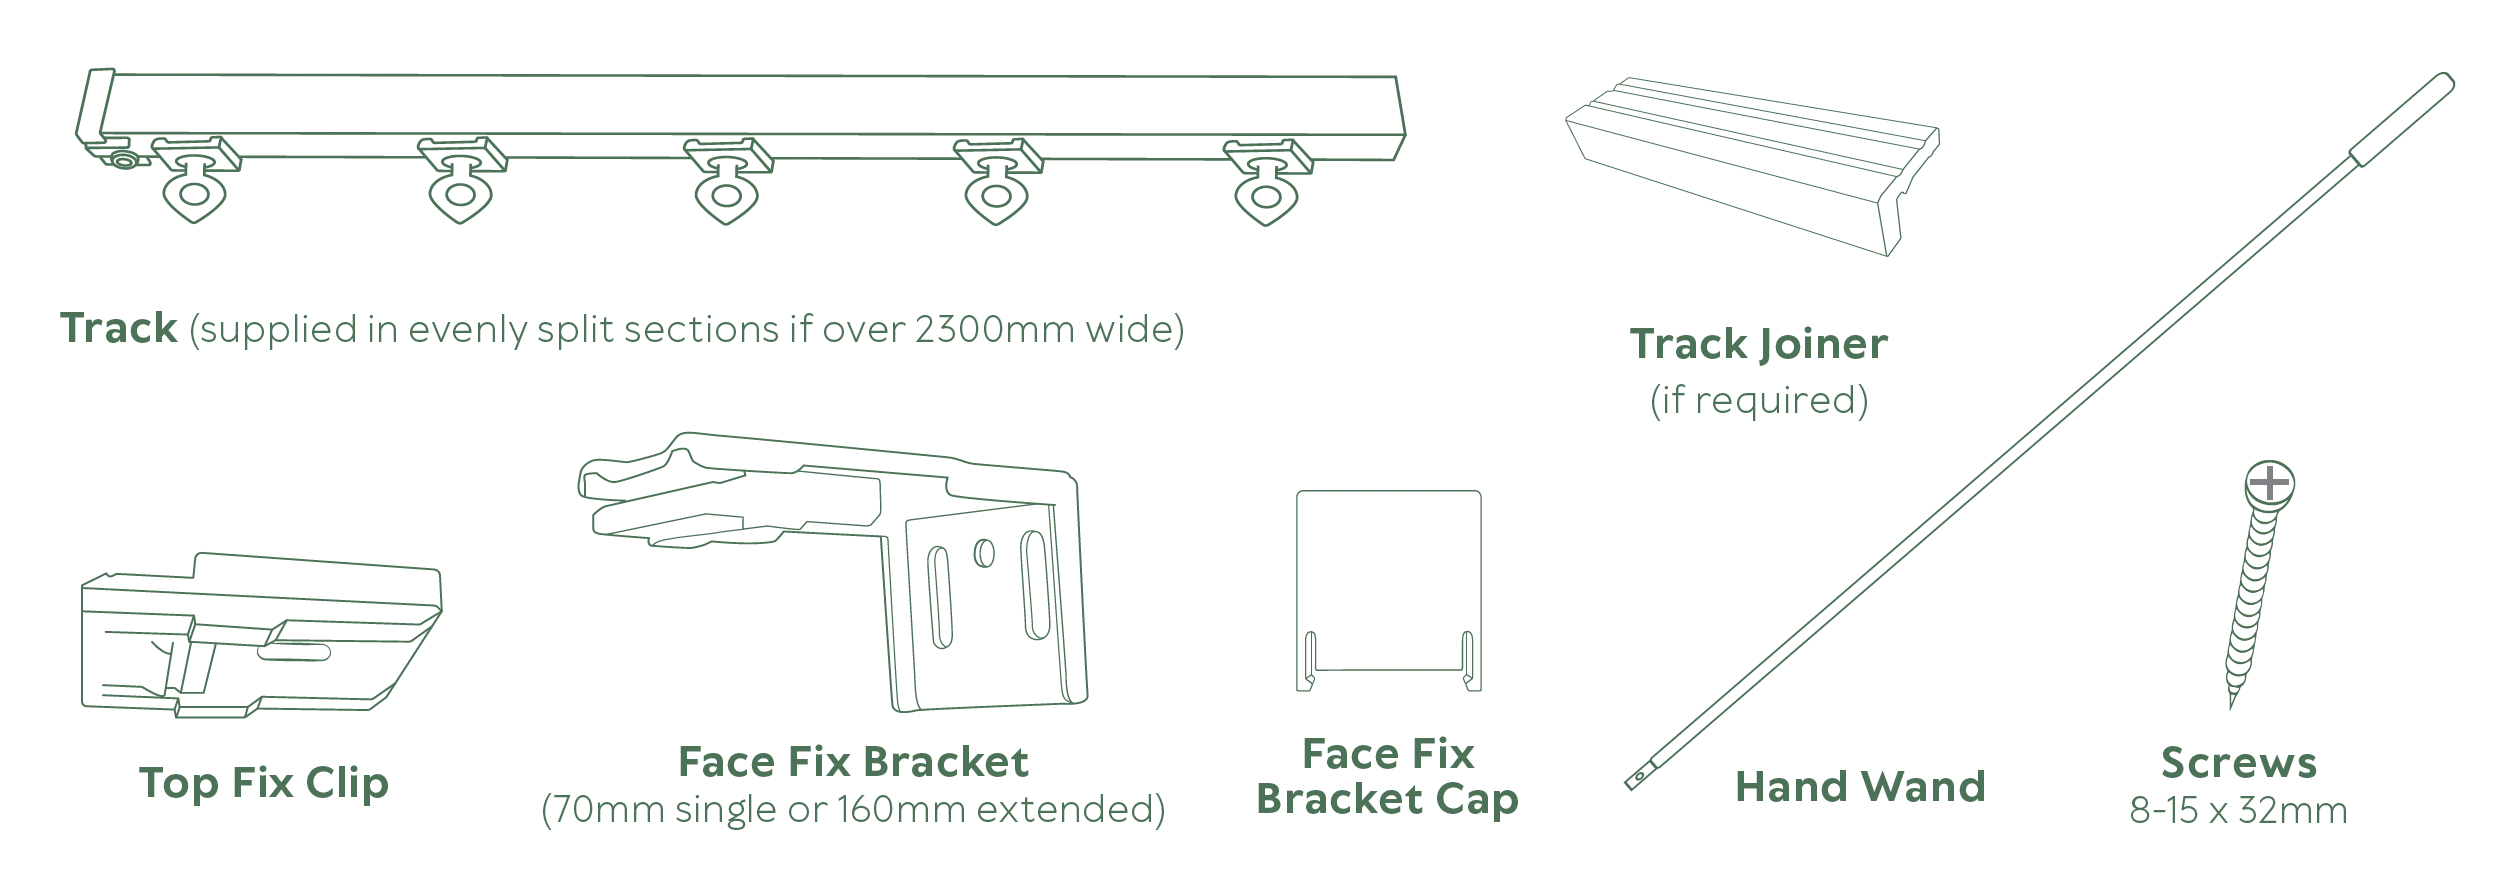
Your curtains will arrive ready to install. However, it is a good idea to check you have all the fitting parts required before commencing assembly. You can identify the items provided using the below image. The number of parts will vary dependent on your curtain order and the track widths. In the event you find you are short or missing any parts, please get in touch so we can quickly arrange supply with you.
Before you start…
The following items are required to complete installation safely and accurately:
- Power drill
- Phillips head screwdriver
- Pencil, pad and metal tape measure
- Spirit level
- Small step ladder
- Stud finder (if required)
- Protective eyewear and gloves if drilling into masonry, tile or meta
- It is advisable to have a second person available to assist with fitting the curtain to the track.
Before commencing assembly, determine the correct fitting location for your window, being either top fix (to the ceiling surface) or face fix (to the wall). This location (and the relevant brackets) should correspond with your original order information. If not, please contact us for assistance.
For face fitted double curtains, install the rear (blockout) curtain closest to the window before the front (sheer) curtain closest to the interior. This will alleviate additional load on the brackets.
What are you drilling into?
The general purpose 8-gauge, 32mm screws provided with your order should be appropriate for fixing our brackets to most standard wall surfaces. However, you will need to source wall plugs or hollow wall anchors for fixing into plasterboard when there is no stud or batten present.
Plasterboard/Gyprock: Use a stud finder to locate your wall studs. This will inform the location of your brackets. Then use the provided screws to fasten the brackets into the surface and stud.
Brick/Masonry: Drill pilot holes before using a 6mm masonry drill bit to drill 35mm deep holes. Insert 8 gauge (6mm) wall plugs into the holes. Fasten the brackets to the wall using a Phillips head screwdriver (or impact drive bit) and the provided screws.
Joining your track sections
Tracks ordered at widths over 2300mm will be supplied in split sections due to shipping limitations. These track sections need to be joined together with the small ‘joiner’ component as follows:
a. First, insert the joiner half way through one length of the split track

b. Slide the second length of the split track over the exposed half of the joiner
c. A little force may be required to connect the two track segments until flush

Face Fit Curtains
Step 1. Position two brackets approximately 150mm from either end of the track on the left and right sides. Fasten these brackets with the provided screws or screws appropriate for your wall surface, ensuring the brackets are all set level.
Position any remaining brackets evenly between the two end brackets, ideally at 700 – 750mm intervals from one another. When arranged, fasten all brackets in place. You should have been supplied with the correct number of face fit brackets to achieve this outcome. If that’s not the case, please contact us for support.

Pro tip: the very top of the brackets should line up with the topmost point of the drop measurement provided in your order. Loosely fasten the screws in the centre of the bracket holes as this will allow you to adjust the bracket position up and down to achieve the perfect drop.

Please note, we have already made a 15mm deduction to your total curtain drop to allow for the curtain to be underslung on your track. This does not affect the fixing point of your bracket.
Step 2
a. Clip the track into the brackets by securing the back of the track between the metal and the plastic clip

b. Gently secure the track by tightening the underside screw (only if required)

c. Clip the bracket caps over the internal face of the brackets to cover the screw heads

Top Fix Curtains
Step 1. Position the first two top fixing clips approximately 150mm from each end of the track on the left and right sides. We recommend that each one should be fitted about 80mm forward of the window. However, this should be assessed on sight of what is most appropriate for your space. Position any remaining clips between the first two clips at even points about 700-750mm width apart.

Pro tip: for double curtains, position the clips for the front track (your sheer curtain) approximately 100mm in front of the rear clips (your blockout curtain).
Step 2. Insert the track into the ceiling mounted clips. Do this by securing the back of the track between the ceiling and the plastic clip. Gently press the track into the bracket until it ‘snaps’ into place. This will happen when the track clips into the small ridge on the bracket.

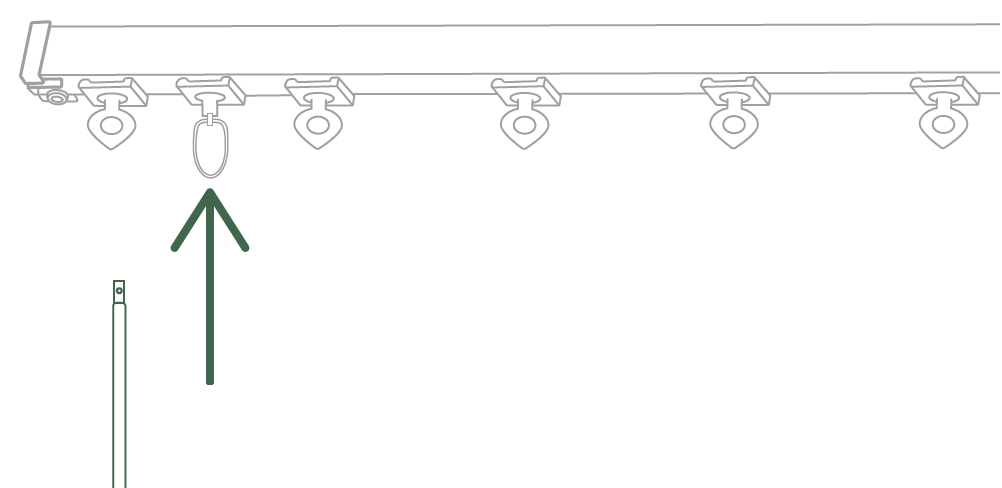
Connecting the hand wand
Connect the hand wand to the dedicated runner on the opening side of your track. For S-fold curtains, the dedicated runner will look a little different from the rest of the runners. For a pinch pleat curtains, reserve the second runner for your wand. Initially, the clip on the wand can be a little stiff. If so, use pliers to gently pry it open so it can be more easily attached to the runner. In the event of any damage occurring, please contact us.
Hanging your curtains
S-fold curtains
To hang your S-fold curtains, use the hooks already attached on the back of the curtain to loop through the string of curtain runners found inside your track. To achieve the wave effect, make sure the waves are of even depth in front and behind the track. If some waves look ‘shallow’ then gently push that fold back so it creates a deeper wave at the rear.
Pro tip: start the hanging process from the curtain stacking side, with the edge of the curtain pointing towards the window.

Pinch pleat curtains
To hang your pinch pleat curtain, simply use the hooks already attached on the back of the curtain to loop through the loose curtain runners. If you require more runners, simply unscrew the end cap of the track and load in as many as you require from the amount provided. If you feel you need more runners, get in touch and we’ll get them to you.

Pro tip: initially, runners may be a little stiff and resistant to movement with the wand. While this will ease with use, if you would like to speed things up (in all senses!), we recommend removing the curtain and applying a very small amount of spray lubricant to the inner track area. Leave it for at least a 2 hours and then carefully re-attach the curtain hooks to the runners (ensuring you have none of the lubricant on your hands before doing so!).
Dressing your new curtains
Being the amazing DIY installer you are, you’ve now successfully installed your curtains – well done! But wait a minute, are they looking a little disheveled from their epic journey? If so, don’t despair as it’s actually pretty simple to sort out. Watch our ‘Dressing your new curtains’ video below and you’ll have them looking ‘tip top’ in no time!