Cellular Blinds
How to install cordless Cellular blinds
Cordless Cellular blind installation instructions
Please note – illustrations and diagrams provided are not to scale and are for visual reference only.
Fixing parts included (per blind)

Before you start…
Check all the above fixing parts have been supplied. In the event of a missing part (or parts) contact us for support. The number of fixing parts will vary in relation to the size and number of blinds supplied. Please ensure the blind is mounted using a spirit level for correct operation. The following tools and instruments are required to complete installation safely and accurately:
- Power drill
- Phillips head screwdriver
- Pencil & tape measure
- Spirit level
- Small step ladder (if possible)
- Protective eyewear & gloves (if drilling into masonry, metal or tile)
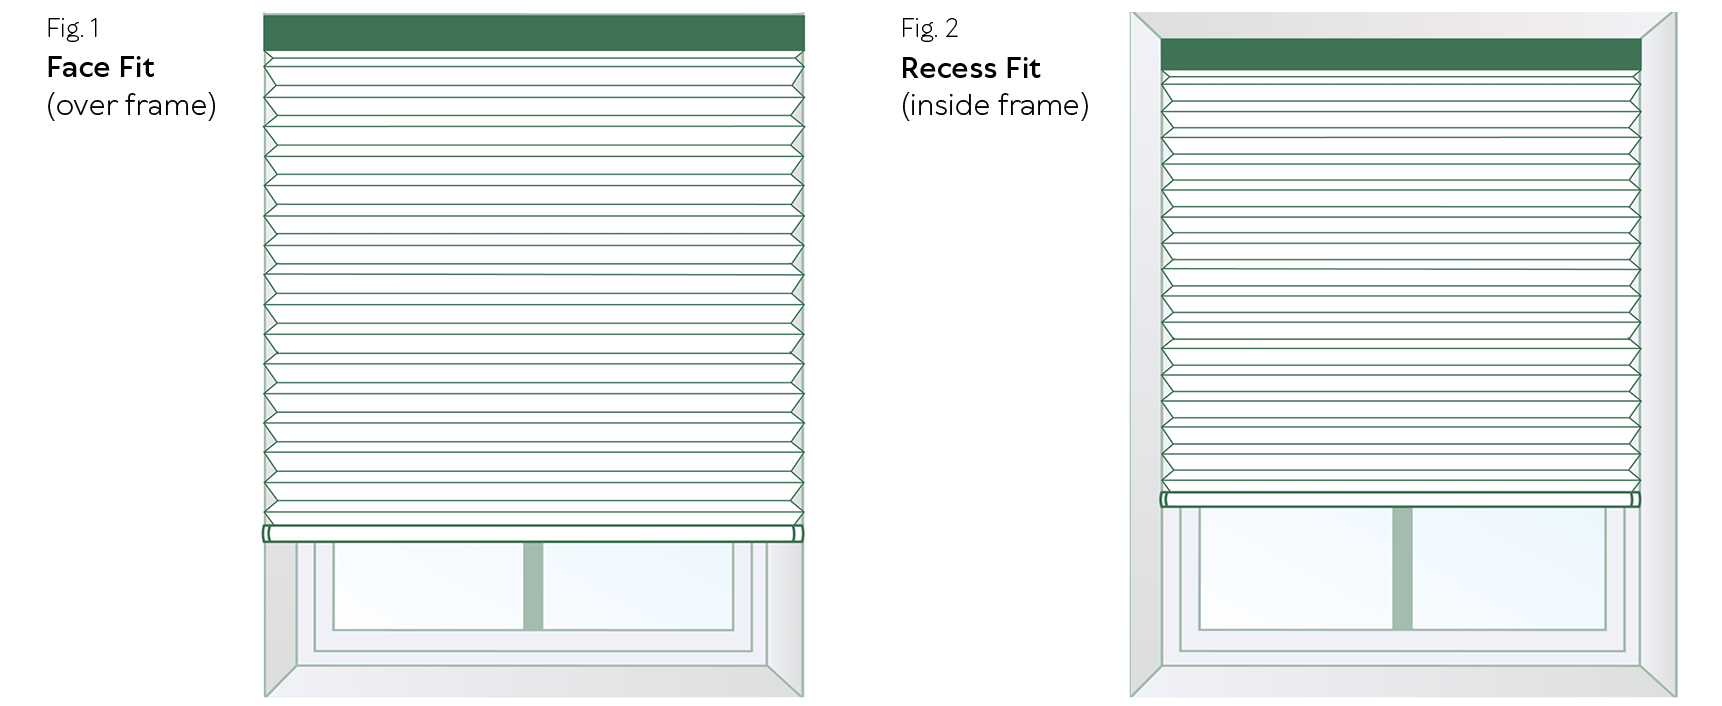
Fitting location
Before commencing installation, determine the correct fitting location for your window. The location should correspond with your order information. Please note, your finished size for a Face Fit blind is as per the ordered size. For a Recess Fit blind, the supplied width will be 10mm less than ordered. This is to allow for smooth operation inside the recess.
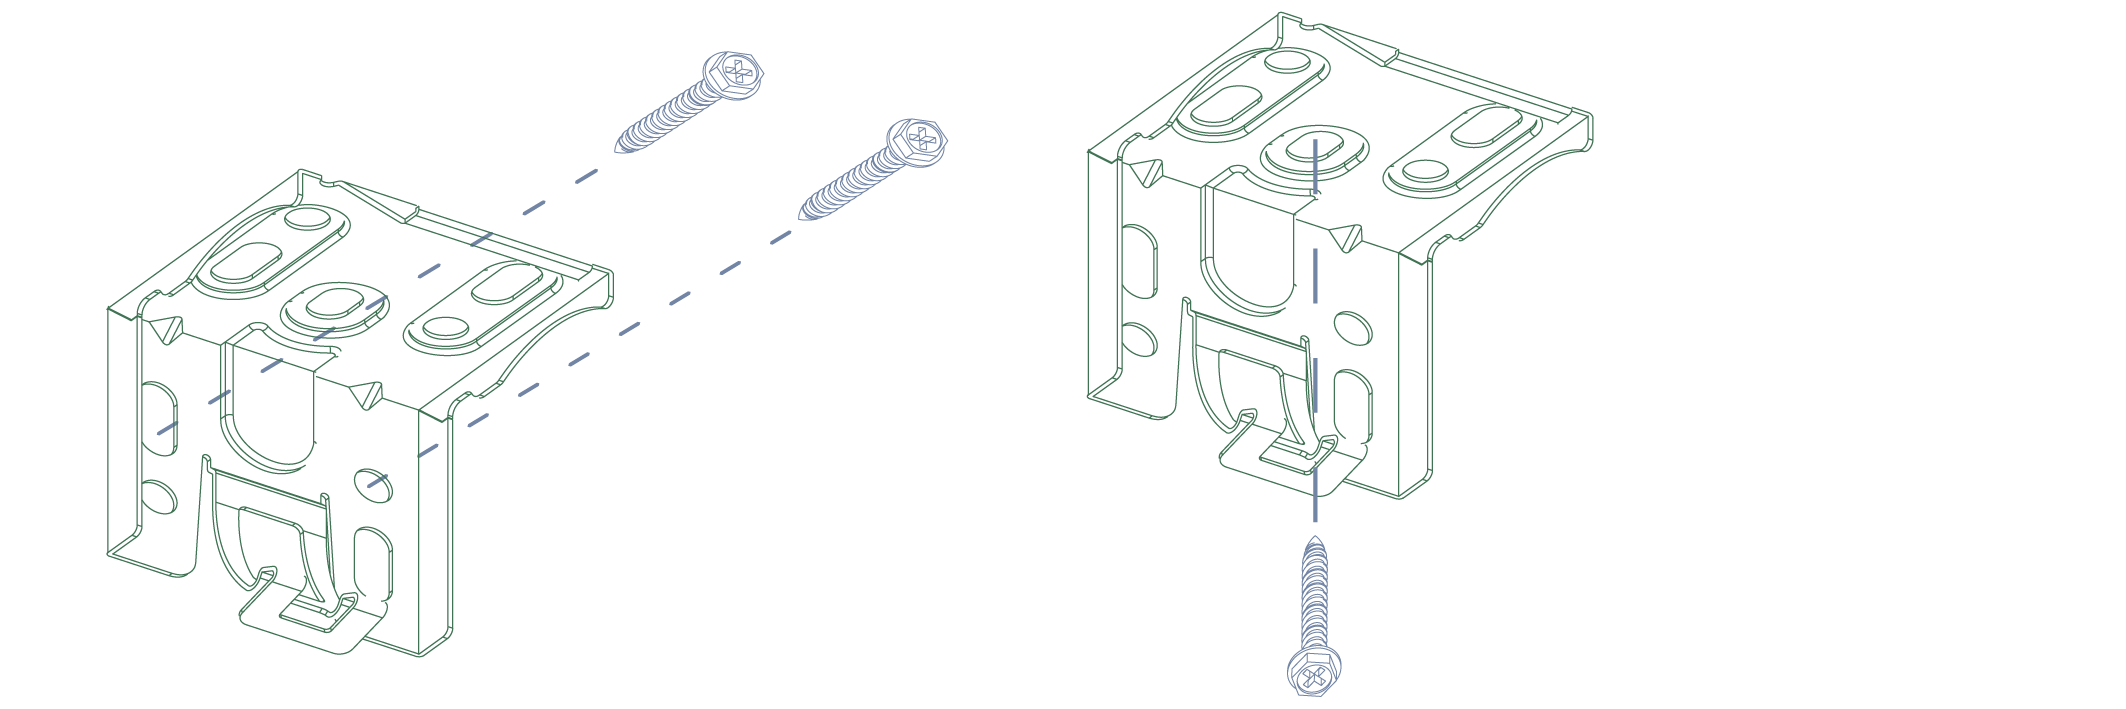
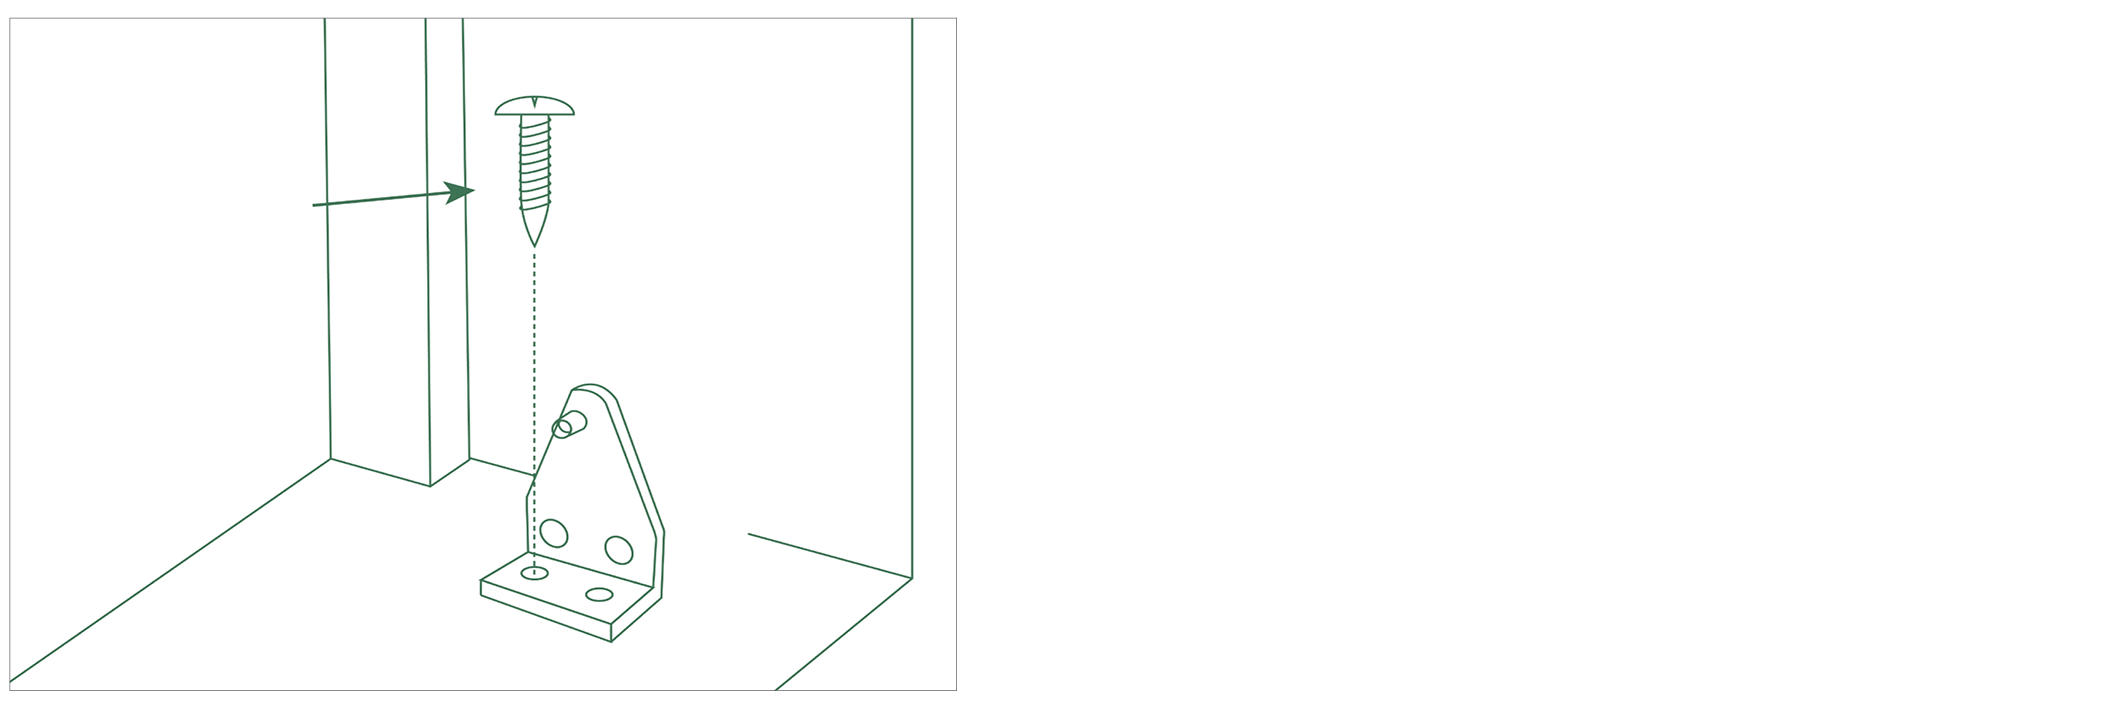
Step 1 – Installing the mounting brackets
The mounting brackets should be fixed approximately 50mm from each end (left and right) of the blind’s headrail.
For blinds exceeding 1200mm width, an additional bracket should be positioned centrally for support.
Face Fit Bracket Recess Fit Bracket
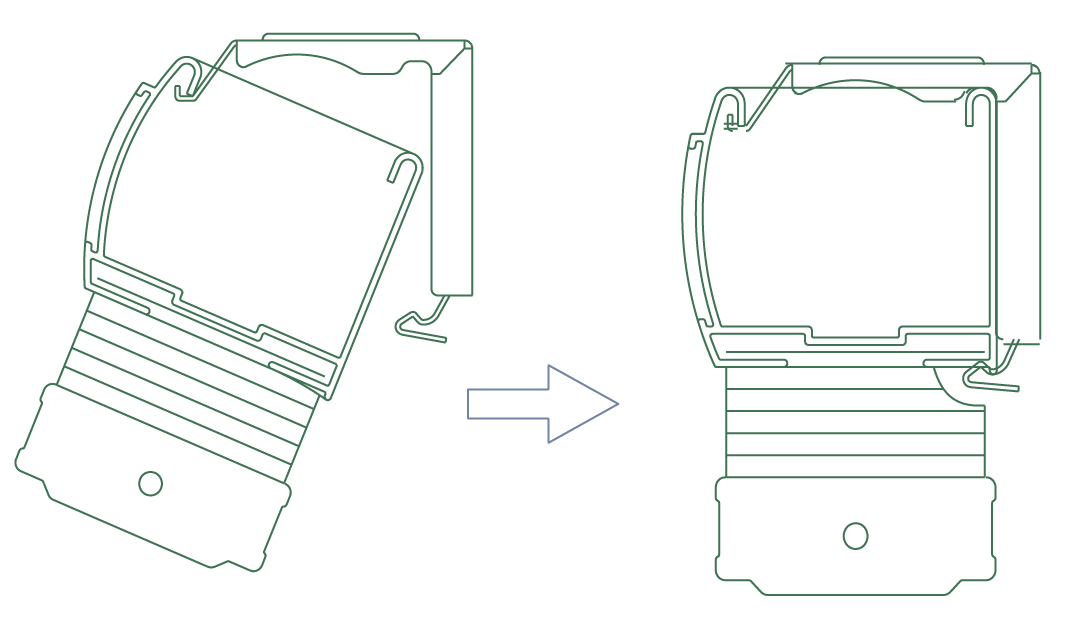
Step 2 – Attaching the blind headrail
Position the front edge of the headrail into the front hook of the mounting bracket. Then, gently push the headrail towards the window until it “snaps” into position.
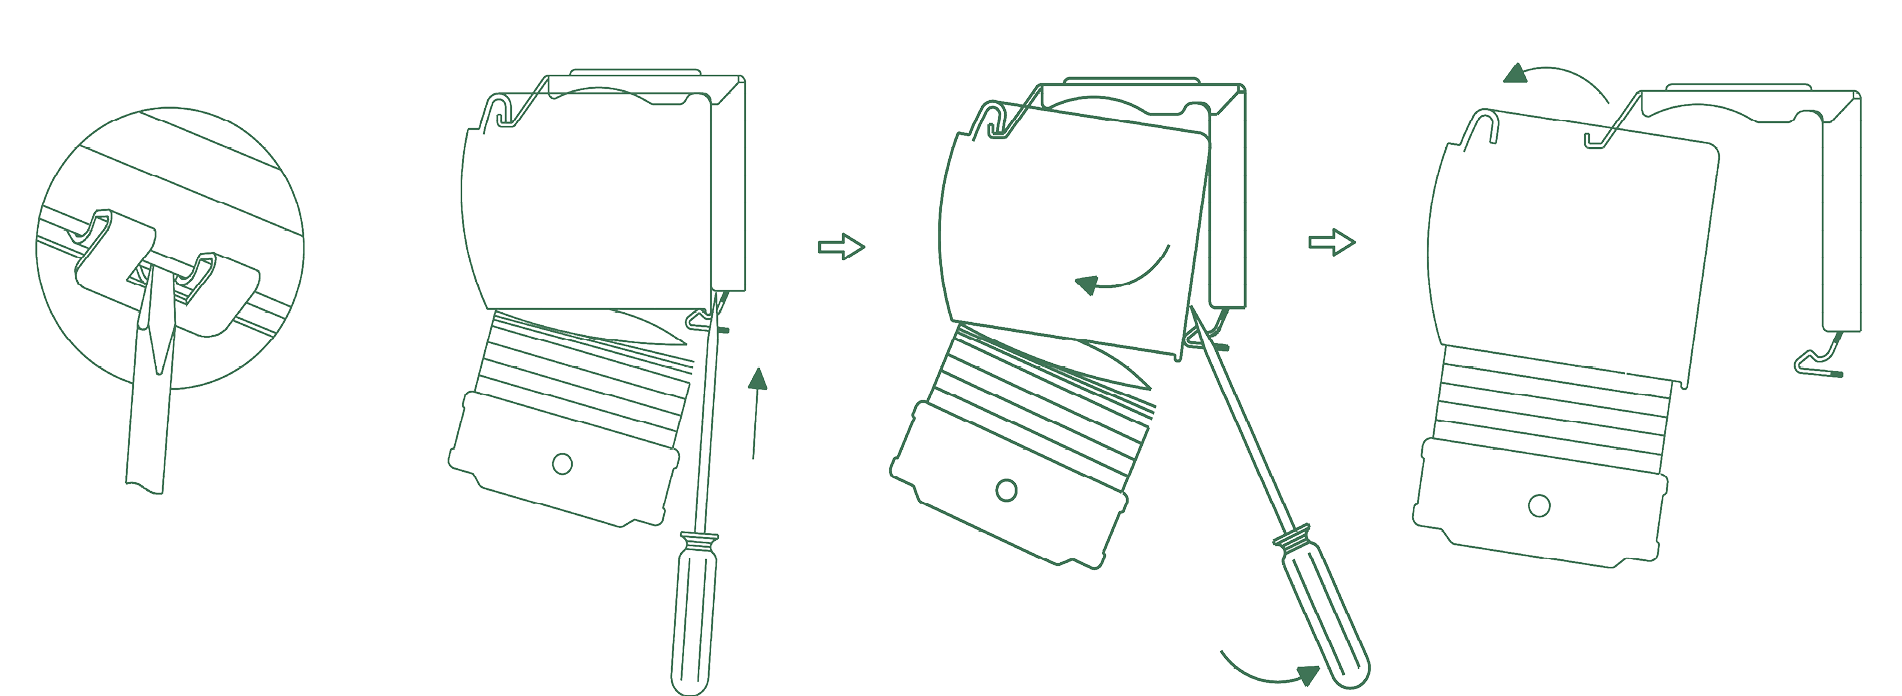
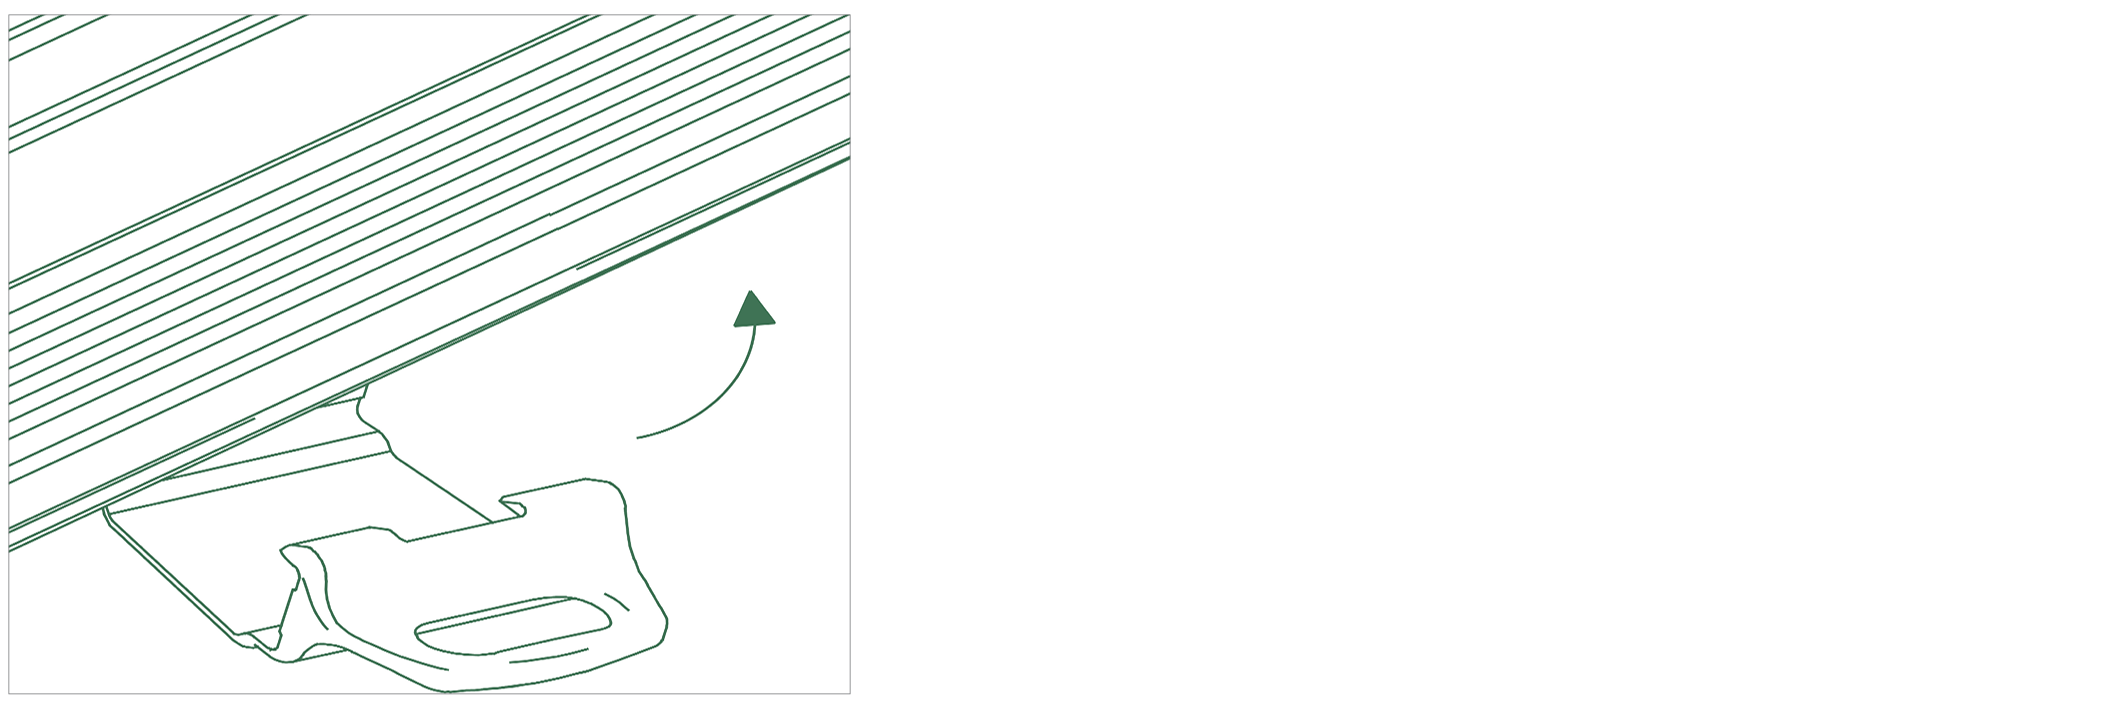
Please note, if required for repositioning, you can remove the headrail by inserting a screwdriver into the mechanism to release the rail from the bracket.
Step 3 – Attaching the handle
Clip the handle onto the base of the blind’s bottom rail in a central position.
Step 4 – Installing the hold down clips (if ordered)
Using the screws provided, attach the base of the hold down clip to the window recess or sill. Additional fixing is possible through the side of the bracket (when suitable). Once attached, snap the hold down clip pin into the guide hole found on the end of the blind’s bottom rail.
Please note, after completing the installation, lower your blind to its full drop and leave for 24-hours to allow it to settle to its full length before use.